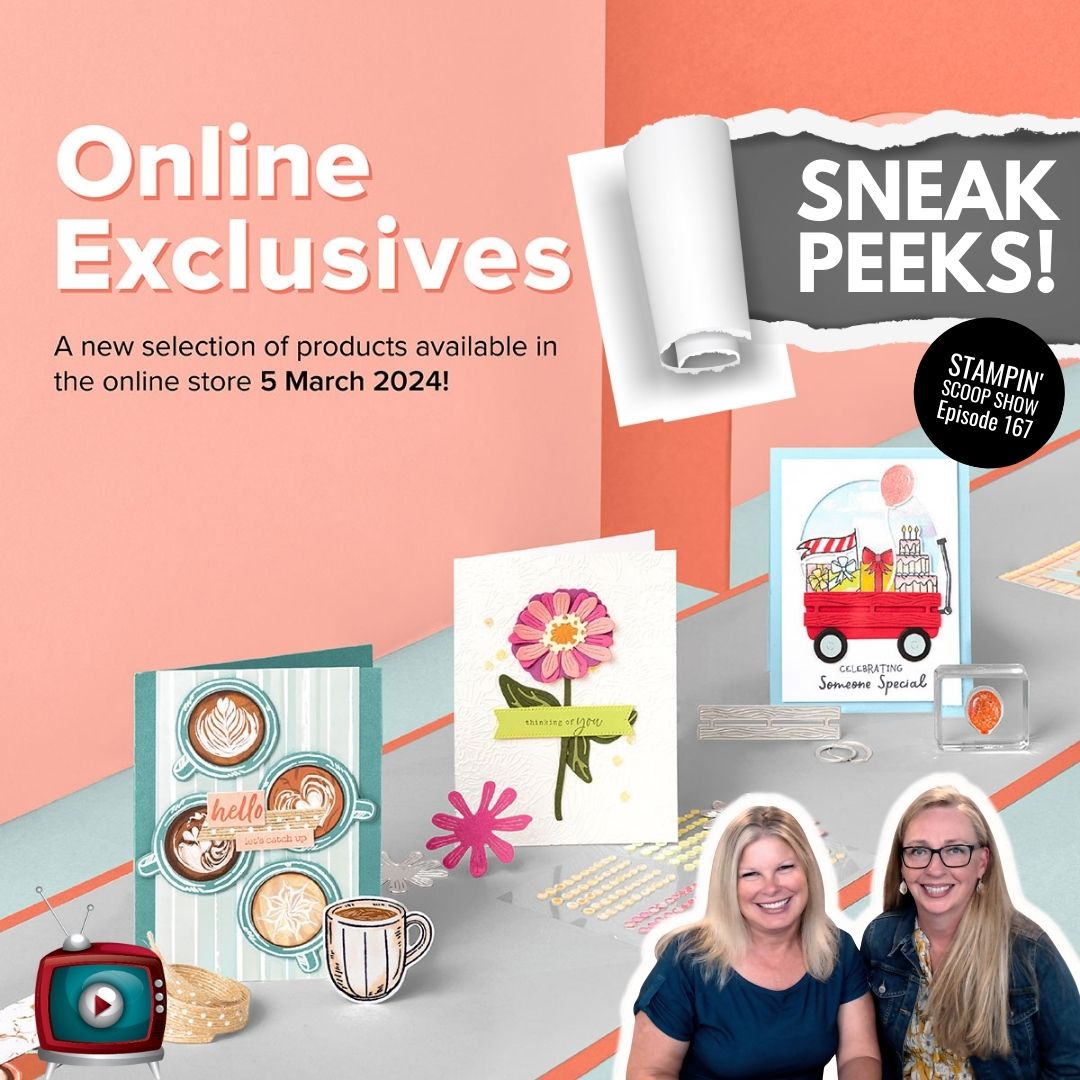
NEW STAMPIN UP ONLINE EXCLUSIVES
🔥👀 Excitement is in the air! Get ready to be dazzled as we prepare to launch a stunning array of new Online Exclusives that will take your crafting experience to the next level. 🙌💃🏻 I don't know about you, but I am over the moon with anticipation! 🌝
🗓️ Save the Date: March 5 🗓️
Mark your calendars because on March 5, we're dropping a collection of goodies that will leave you breathless. From mesmerizing designs to must-have crafting tools, our new Online Exclusives are set to make waves in the crafting community.
But here's the catch – why wait when you can get ahead of the curve? 🚀 Demonstrators, this is your golden ticket! You can pre-order these fantastic products right now and take advantage of exclusive Saleabration deals that will make your crafting dreams come true.
💎 Stampin Scoop Show Sneak Peek Video 💎
Curious to catch a glimpse of the magic that awaits? We've got you covered! Head over to our Stampin Scoop Show sneak peek video, where we unveil some of the enchanting products that will soon be available. Trust me; you won't want to miss this sneak peek extravaganza!
🎉 Pre-Order Now and Unlock Saleabration Deals! 🎉
Demonstrators, this is your time to shine! Pre-order these Online Exclusives now and enjoy the added bonus of exclusive Saleabration deals. It's the perfect opportunity to stock up on the latest and greatest while scoring some fantastic perks.
🛍️ Demonstrator Kit Special: Elevate Your Crafting Journey 🛍️
Now, here's the cherry on top! This is the perfect time to consider purchasing the Demonstrator Kit and infuse your crafting space with our fabulous Online Exclusives. Not only will you get these exclusive products in your kit, but you'll also have the chance to include any current products you desire.
And guess what? You won't want to miss out on the Saleabration deals that come with the Demonstrator Kit. It's a win-win situation – you get to kickstart your creative adventure with the latest releases and enjoy fantastic discounts during Saleabration.
🌟 More Details Below 🌟
Ready to dive into the details? Check out the additional information below to ensure you're fully prepared for the grand unveiling on March 5. We've got all the insider info you need to make this release an unforgettable crafting experience.
SNEAK PEEK VIDEO
https://www.youtube.com/watch?v=4PsNKi_kt8k
MORE SNEAK PEEK VIDEOS & BROCHURE
Below are some Sneak Peek videos from Stampin Up showcasing the new suites. And a brochure on the new release.
DOWNLOAD THE PDF BROCHURE
FLOWERING ZINNIAS SUITE COLLECTION
A LITTLE LATTE SUITE COLLECTION
WANT THESE PRE-ORDER PRODUCTS NOW?
Are you an avid crafter always on the lookout for the latest and greatest in the crafting world? Well, we've got some exciting news for you! Stampin' Up! is offering a fantastic opportunity for demonstrators to get their hands on Pre-Order Online Exclusives before anyone else. Yes, you heard it right – demonstrators can enjoy early access, along with exclusive discounts and additional perks. Let's dive into the details of this incredible offer.
Demonstrator Pre-Order Exclusives:
Being a Stampin' Up! demonstrator comes with its own set of perks, and one of the most exciting ones is the ability to snag Pre-Order Online Exclusives before they hit the shelves for the general public. Demonstrators not only get the satisfaction of being among the first to experience these hot products but also benefit from the coveted demonstrator discount. This exclusive access ensures you never miss out on the latest and trendiest crafting supplies, all while avoiding the disappointment of fast sell-outs.
Demonstrator Kit Deal:
But wait, there's more! Stampin' Up! is sweetening the deal even further with the Demonstrator Kit Special. When you purchase the demonstrator kit during Saleabration, you're in for a treat. This special offer allows you to build your own kit with products of your choice, ensuring you receive over $99 worth of pre-order and/or current products. Not only do you get to customize your crafting arsenal, but you also benefit from the additional Saleabration perks.
LEARN MORE ABOUT THE DEMO KIT
Saleabration ends February 29!Take advantage of the extra Saleabration bonuses on the demo kit.
Join Stampin' Up! for the Discount:
Are you hesitant about becoming a demonstrator? Fear not! One of the best-kept secrets is that you can join Stampin' Up! simply for the discount. If you're an enthusiastic crafter with a wishlist bursting with over $99 worth of products, this is your golden opportunity. By joining Stampin' Up! during Saleabration, you not only become a part of a vibrant crafting community but also enjoy the demonstrator discount on your purchases. It's the number one reason to join and a fantastic way to turn your crafting dreams into reality while saving money.
Stampin' Up! is not just about products; it's about creating a community of passionate crafters who share their love for creativity. Becoming a demonstrator opens doors to exclusive opportunities, discounts, and the chance to be at the forefront of the crafting world. So, if you're ready to take your crafting journey to the next level, consider joining Stampin' Up! as a demonstrator. Don't miss out on the Pre-Order Online Exclusives and the unbeatable Demonstrator Kit Special – it's time to make your crafting dreams come true!
LEARN MORE ABOUT JOINING
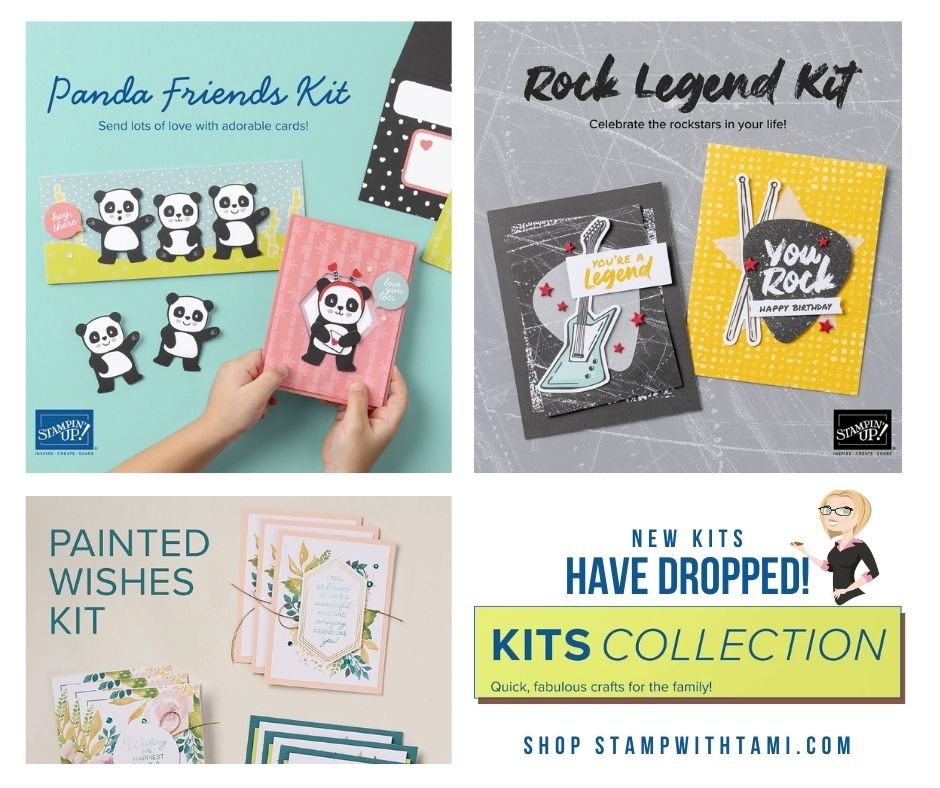
NEW KITS IN THE KITS COLLECTION
These 2 New Kits Just Added to the Kits Collection! The Birthday Sparkle Kit and Happy Houseplants Kit. Unlike the other Online Exclusives we shared on the video that won't be in my store until March 5, the kits are available now in my online store.
Stampin’ Up Kits Collection: Elevate Your Crafting Experience
Experience the joy of crafting with Stampin’ Up Kits Collection, where creativity knows no bounds. These paper crafting kits are designed to make the creative process fun and easy, providing you with all the essentials to craft artistically designed handmade projects. Here’s what you can expect:
- All-Inclusive Kits: The Kits Collection comes with everything you need, from step-by-step instructions to precut pieces, embellishments, and more. No need to worry about gathering supplies; it’s all conveniently included in the kit.
- Diverse Selection: Choose the kit that suits your style and occasion. With a diverse assortment of options, the Kits Collection caters to a variety of themes and design preferences. New kits are regularly added each month, ensuring a fresh and exciting crafting experience each time.
- Flexibility: Select the kit that aligns with your preferences and availability. The Kits Collection offers flexibility, allowing you to choose projects that resonate with your creative vision.
- Purchase anytime: You can conveniently purchase the Kits Collection at any time through my online store. Simply browse the selection, choose the kit that speaks to you, and embark on your creative adventure.
ALL AVAILABLE KITS
EARN FREE PRODUCTS DURING SALEABRATION
Ways to Saleabrate:
-
Earn Free Products with Every Order: Dive into a world of creativity by earning free Saleabration products with every $50 purchase in my online store. The more you shop, the more exclusive items you can add to your crafting stash. It’s the perfect opportunity to try new products and expand your creative horizons.View the Saleabration Catalog
-
Unlock the Saleabration Demonstrator Kit: Join the Stampin’ Up family and become a demonstrator during Saleabration to enjoy an extraordinary offer. Receive a Free Glass Mat and choose between $25 or $55 worth of additional free products when you purchase the Saleabration special Demonstrator Kit. It’s the ideal way to start your crafting journey or enhance your existing collection.Click for more details
-
Maximize Savings with Paper Pumpkin: Elevate your Paper Pumpkin experience by combining Pre-Paid Paper Pumpkin subscriptions with Saleabration. This winning combination ensures you not only receive your monthly crafting kit but also enjoy additional freebies, making every project an extra special delight.Click for more details
-
Earn Extra Stampin’ Rewards: For those who love to indulge in a crafting spree, here’s an exclusive offer. Receive an additional $30 in Stampin’ Rewards on orders exceeding $300. This is on top of the regular Stampin’ Rewards that kick in with orders totaling $150. It’s the perfect incentive to treat yourself or gather friends for a crafting party and share the rewards.
ONLINE EXCLUSIVES COLLECTION
Introducing the Stampin’ Up Online Exclusive product line, an exclusive collection showcased solely in our online store, offering a curated assortment of products that won’t be found in any of our catalogs. This distinctive lineup is designed to provide customers with a unique online shopping experience, unveiling a range of creative offerings that go beyond the traditional catalog selection.
These are the currently available Online Exclusives. You can purchase these in my online store by clicking the thumbnail, or going to my Online Store and clicking ONLINE EXCLUSIVES.
SHOP ONLINE EXCLUSIVES
GIVEAWAY & HOW TO ENTER
Enter to win our Painted Wishes Card Kit Giveaway. No purchase necessary. To enter subscribe to my Youtube Channel and leave a comment on the Stampin' Scoop Show Episode 167 video.
See all of my active giveaways and Winner List and Entry form for all recent contests on my Winners Page.
PURCHASE THE PAINTED WISHES KIT
If you love this Painted Wishes Kit as much as we do, check it out in my online store in the Kits Collection.
WHAT IS THE STAMPIN' SCOOP SHOW?
The Stampin' Scoop Show is a captivating and interactive livestream program hosted by Stampin' Up! Demonstrators Tami White and Linda Cullen. This live video broadcast invites viewers to become an integral part of the show, fostering a dynamic and engaging experience. Each episode is a delightful blend of the latest news, updates on upcoming and current Stampin' Up! products, and an array of inspiring projects that showcase the versatility and creativity of Stampin' Up! materials.
The hosts, Tami White and Linda Cullen, infuse the show with their infectious enthusiasm, creating an atmosphere of fun and laughter. Viewers not only gain valuable insights into the world of stamping and crafting but also become part of a vibrant community of like-minded individuals who share a passion for creativity.
One of the highlights of every episode is the exciting giveaway, adding an element of anticipation for the audience. Whether you're a seasoned crafter or a novice looking for inspiration, the Stampin' Scoop Show provides a delightful mix of information, entertainment, and the chance to win fabulous prizes. Join in for an entertaining blend of creativity, camaraderie, and the latest Stampin' Up! updates—all in a live, interactive format that makes crafting a shared and enjoyable experience.
FOLLOW TAMI ON YOUTUBE
SEE PAST EPISODES
HAPPY HOUSEPLANTS KIT
The Happy Houseplants DIY kit by Stampin' Up! just dropped in my online store and we showcased it on today's video. It's the latest gem in the Kits Collection and let me tell you, it's a game-changer. Linda and I had a blast putting together all four framed decor pieces live on the Stampin Scoop Show video, and get this – it only took us 10 minutes! Yep, you read that right. What's even cooler? The frames are INCLUDED! So, kick back, watch the video, and let the plant party begin. Spruce up your space effortlessly with these Happy Houseplants – the easiest way to bring the outdoors in. 🌟
PURCHASE HAPPY HOUSEPLANTS KIT
https://stampwithtami.com/blog/2024/02/new-stampin-up-online-exclusives-are-coming-3/
![Doggone Friendly Card [Upright Z Fold Series #5]](https://stampwithtami.com/blog/wp-content/uploads/2024/02/Stampin-Up-Doggone-Friendly-Upright-Z-Fold-Card-stampwithtami-Instagram-Post.jpg)

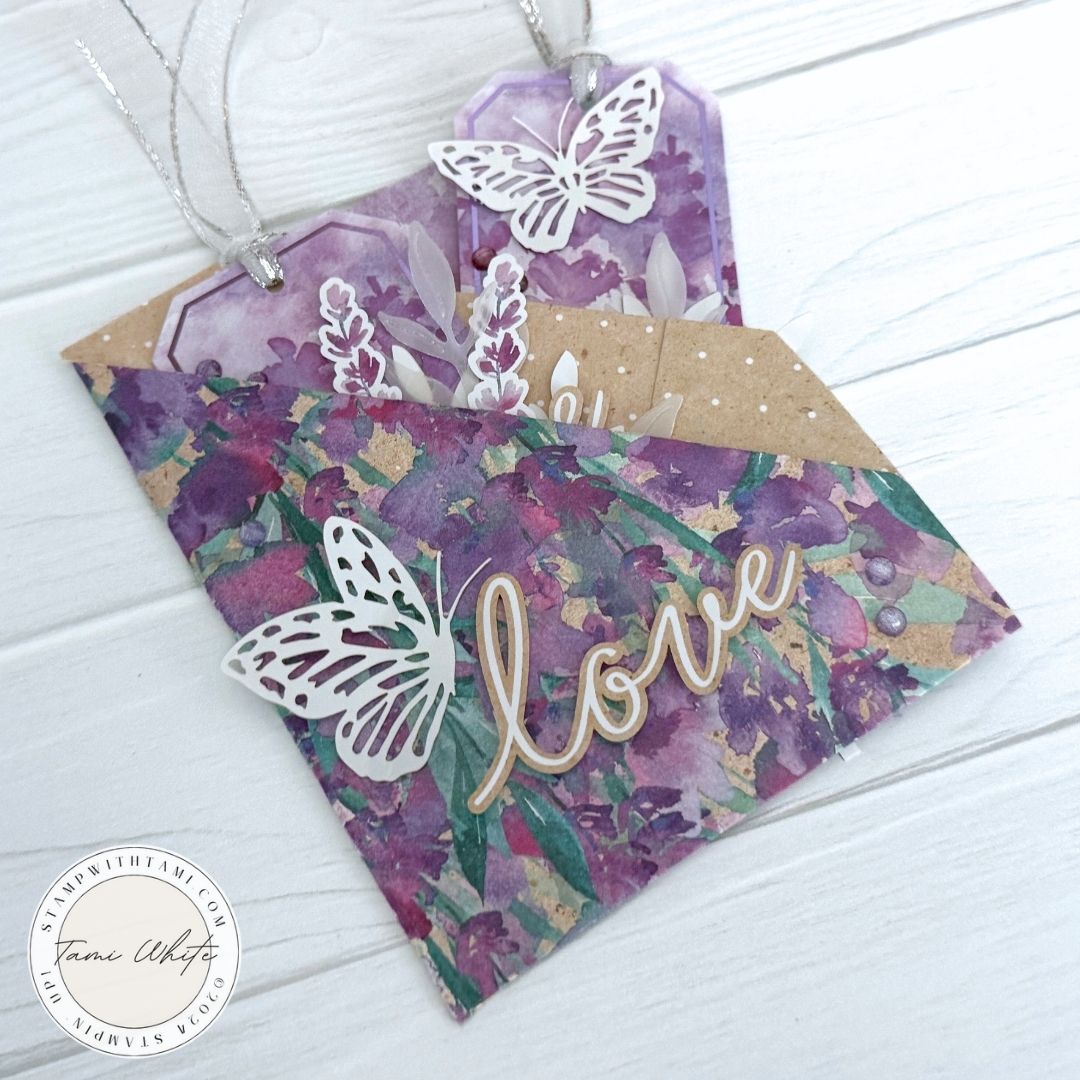
![Adoring Hearts Card [Diagonal Pocket Fold Series #4]](https://stampwithtami.com/blog/wp-content/uploads/2024/02/Stampin-Up-Adoring-Hearts-Double-Pocket-Tag-Card-stampwithtami-Instagram-Post2.jpg)
![Bee Mine Card [Diagonal Pocket Fold Series #3]](https://stampwithtami.com/blog/wp-content/uploads/2024/02/Stampin-Up-Bee-mine-Double-Pocket-Tag-Card-stampwithtami-Instagram-Post1.jpg)


![Cradled in Love Card [Upright Z Fold Series #4]](https://stampwithtami.com/blog/wp-content/uploads/2024/02/Stampin-Up-Cradled-in-Love-Upright-Z-Fold-Card-stampwithtami-Instagram-Post.jpg)


![Excellent Eggs Easter Wreath Card [Circle Wreath Series #10]](https://stampwithtami.com/blog/wp-content/uploads/2024/02/Stampin-Up-Excellent-Eggs-Circle-Wreath-card-stampwithtami-Instagram-Post.jpg)
![Rock Star Wreath Card Part 2 [Circle Wreath Series #9]](https://stampwithtami.com/blog/wp-content/uploads/2024/01/Stampin-Up-Rock-and-Roll-Circle-Wreath-Card-stampwithtami-Instagram-Post-22.jpg)
![Rock Star Wreath Card Part 1 [Circle Wreath Series #8]](https://stampwithtami.com/blog/wp-content/uploads/2024/01/Stampin-Up-Rock-and-Roll-Circle-Wreath-Card-stampwithtami-Instagram-Post-21.jpg)
![Rock and Roll Card [Upright Z Fold Series #3]](https://stampwithtami.com/blog/wp-content/uploads/2024/01/Stampin-Up-Rock-and-Roll-Upright-Z-Fold-Card-stampwithtami-Instagram-Post.jpg)
![Trusty Tools Card [Circle Wreath Series #7]](https://stampwithtami.com/blog/wp-content/uploads/2024/01/Stampin-Up-Trusty-Tools-Circle-Wreath-Card-stampwithtami1-instagram.jpg)