Stained Glass Cardinal Accordion Fold Card [So Very Merry Series #2]
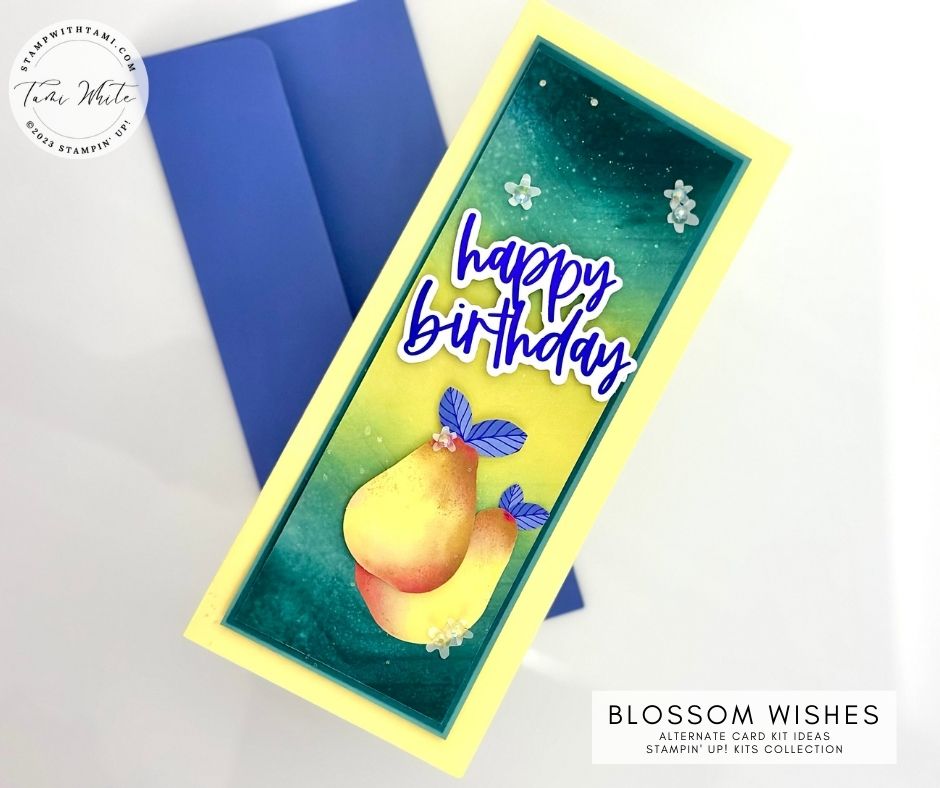
SO VERY MERRY ACCORDION FUN FOLD CARD
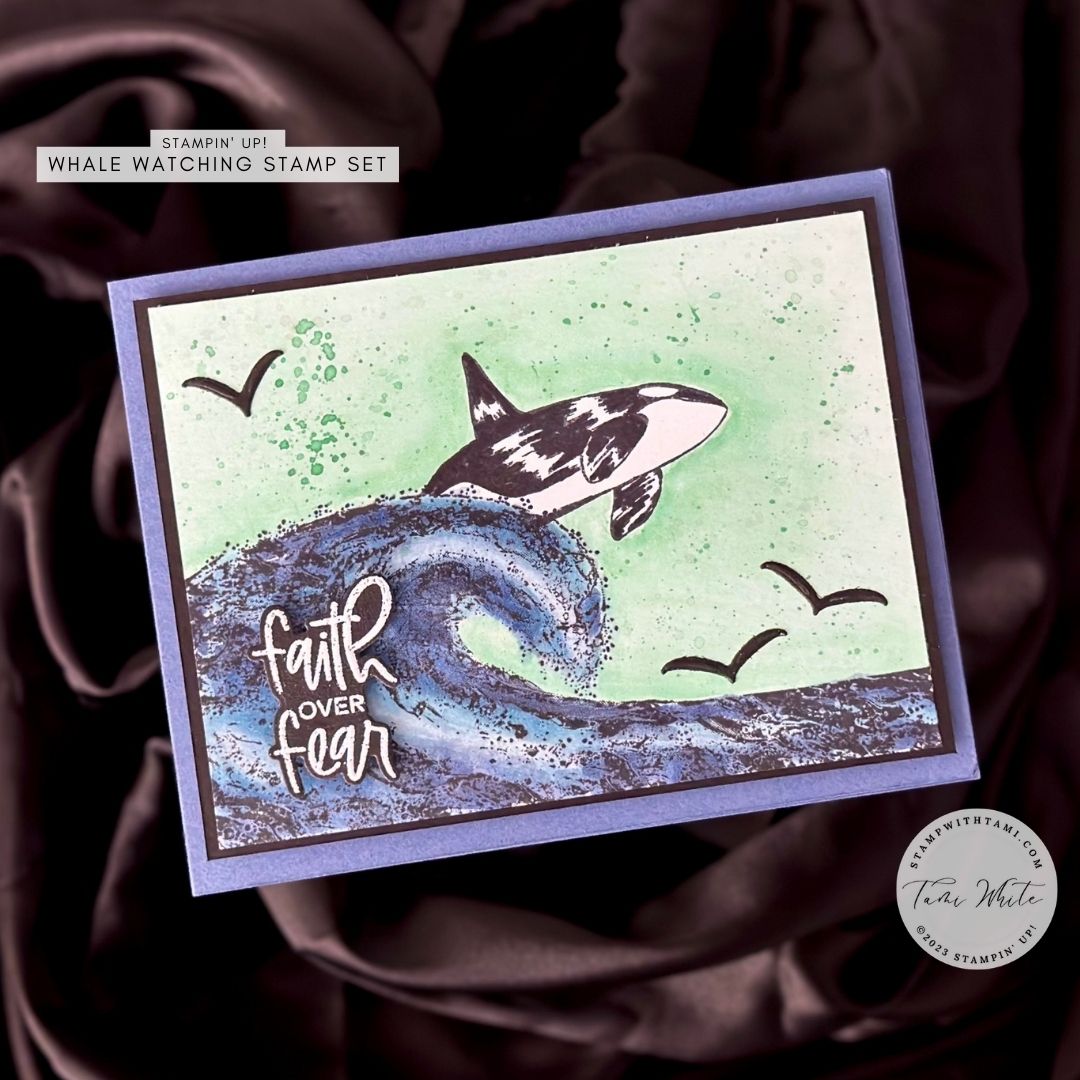
Have you noticed how the Santa and the Angel stamps in the Stampin' Up! So Very Merry stamp set have that gorgeous look of stained glass? βœ¨πŸŽ…βœ¨ But what about the cardinal stamp?  It didn't come with the same background. Which does make it versatile, but I wanted it to have that look.
Well, guess what? πŸ₯ I've decided to jazz things up and create a stained glass effect for our little Cardinal using the Stampin' Up Patchwork Pieces dies. πŸŒˆπŸ•ŠοΈπŸŒˆ Yes, you heard that right! Now our feathery friend can shine just as brightly as Santa and the Angel.
You'll find this stamp set is available in the Online Exclusives section of my online store. πŸŒπŸ›οΈπŸŒ But that's not all! I've also put together some easy-peasy instructions AND a video to show you how to get that fun fold just right. πŸŽ¬βœ‚οΈπŸŽ¬

INSTRUCTIONS

NSTRUCTIONS

POP OUT SWING CARD VIDEO

POP OUT SWING CARD VIDEO

PROJECT PHOTOS
Want to save these ideas for later? Pin them to your favorite Pinterest board.
Have you tried these designs? I love to see your creations! Be sure to share them on #shareyourcrafts post every Saturday on my Facebook Page
I used the new Joyful Christmas designer series paper for the musical notes background. This paper is coming out in the new holiday mini catalog. The background of the bird was created with the Patchwork Pieces die set and Fresh as a Daisy Designer Series Paper. I wanted to create the stained glass effect. I colored the bird with Stampin' Blends Markers. 
I have a couple more cards from the So Very Merry Stamp Set. You can see the pop and swing tutorial here. 

ACCODION FOLD SERIES

STAMPIN UP SUPPLIES I USED
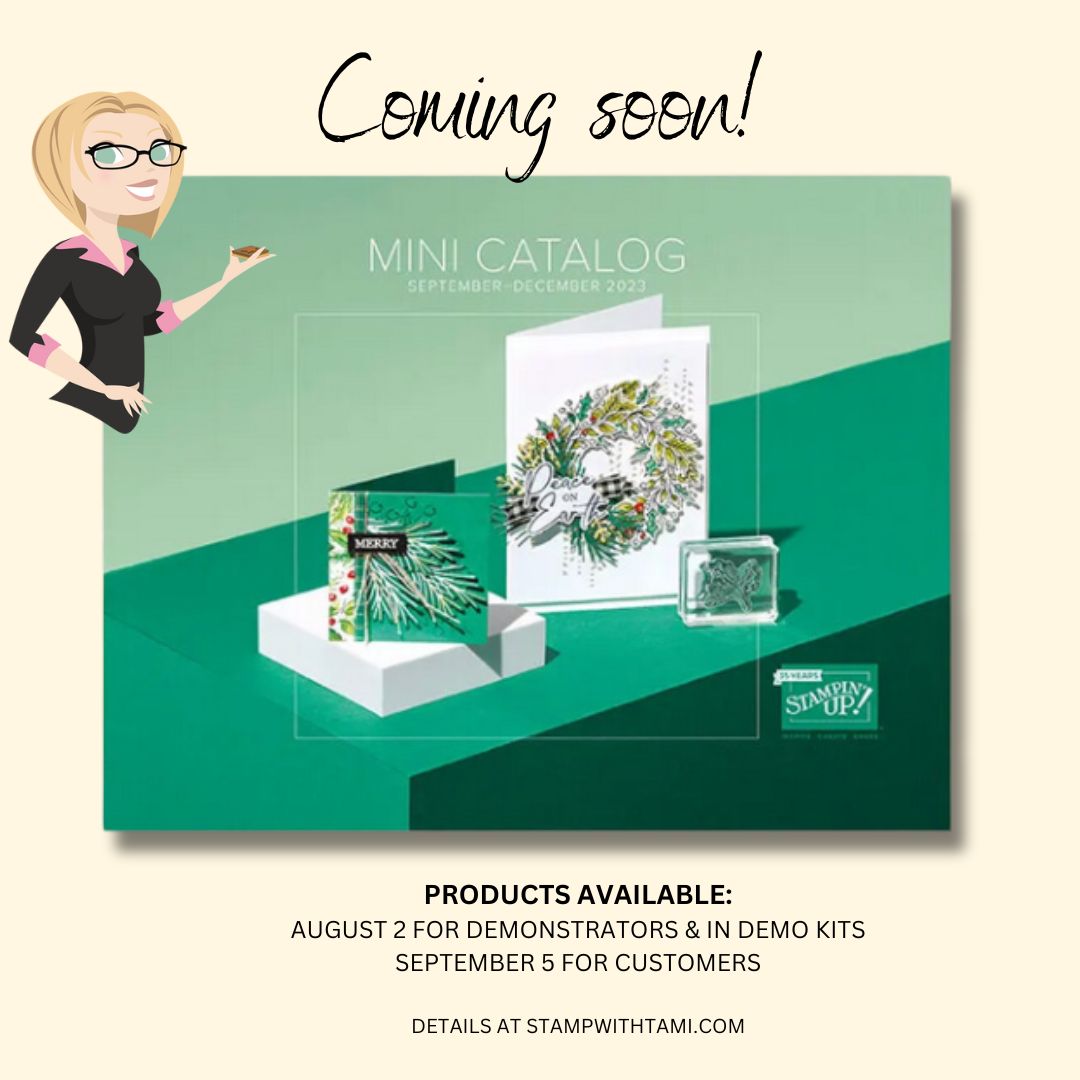
**I also used the Joyful Christmas Designer Paper that is coming out in the 2023 September - December Mini Catalog. Click here for details.
https://stampwithtami.com/?p=75085
Stained Glass Santa Pop Out Swing Fold Card [So Very Merry Series #1]
SO VERY MERRY POP OUT SWING CARD
πŸŽ„βœ¨HO HO HO, craft lovers out there! Christmas is just around the corner and guess what I've been cooking up in my workshop? πŸŽ…πŸ””
'Silver bells, stained glass Santa and fun folds' have beautifully come together in a whimsical pop-out swing card. I used the Stampin' Up! So Very Merry stamp set from the online exclusives to bring in that holiday cheer with Santa and Silver bells! Not just that, I've also incorporated some brand-new products from the upcoming Sept-Dec Mini Catalog - 'A Walk in the Forest Designer Paper' and iridescent ribbon that adds magic to every fold!
For those curious, a detailed tutorial and video for my card creation technique are below as well as a series of pop out swing cards.

INSTRUCTIONS

NSTRUCTIONS

POP OUT SWING CARD VIDEO

POP OUT SWING CARD VIDEO

PROJECT PHOTOS
Want to save these ideas for later? Pin them to your favorite Pinterest board.
Have you tried these designs? I love to see your creations! Be sure to share them on #shareyourcrafts post every Saturday on my Facebook Page
This is an easy and fun fold for any occasion. I love the stained glass look of Santa from the So Very Merry stamp set.The Balmy Blue polka dot and snowflake designer series paper is from the new A Walk in the Forest Designer Series Paper. This paper is coming out in the upcoming Holiday Mini Catalog. It is also part of Stampin' Up!'s Make a Difference. They are donating $3 with every pack sold to support those in need this holiday season.
I colored the image with the Stampin' Blends Markers. It makes me feel warm and fuzzy.    
I have a couple more cards from the So Very Merry Stamp Set. I'll share the tutorials for these over the next couple of days. Meanwhile enjoy my Pop Up Swing Series.

POP OUT SWING SERIES

STAMPIN UP SUPPLIES I USED
**I also used the A Walk in the Forest Designer Series Paper and Iridescent Ribbon that is coming out in the 2023 September - December Mini Catalog. Click here for details.
https://stampwithtami.com/?p=75056
Scalloped Box Gift Card Holders [Teacher Gifts Series #5 & 6]
TEACHER GIFTS - GIFT CARD HOLDERS

🍎🎁 The grand finale of my Teacher Appreciation Series is here!Say hello to scalloped gift card holders! But guess what? These adorable holders aren't just for teacher appreciation - you can personalize them for any occasion simply by changing the images and words! Been feeling the love for Amazon, Starbucks, or Dunkins? All make fabulous gift card ideas to place inside these specially crafted boxes. πŸŽπŸ’Œ
For these, I used the Everyday Thanks and Apple Harvest stamp sets - proof that everyday items can make amazing memories! πŸπŸ’•

INSTRUCTIONS

NSTRUCTIONS

TEACHER GIFTS VIDEO

TEACHER GIFTS VIDEO

PROJECT PHOTOS
Want to save these ideas for later? Pin them to your favorite Pinterest board.
Have you tried these designs? I love to see your creations! Be sure to share them on #shareyourcrafts post every Saturday on my Facebook Page
For these 2 gift card holders I used the Stampin' Up Scalloped Gift Card Boxes, Apple Harvest and Everyday Thanks stamp sets. 
I added the whistle thinking about the coaches and gym teachers.I shared how to color these images on the Teacher Gift video above. The background paper is the Brights Collection.
Don't forget the matching card. 
Links to tutorials for the rest of this series below.

TEACHER GIFT SERIES

STAMPIN UP SUPPLIES I USED
https://stampwithtami.com/?p=75037
Teacher Appreciation Card [Teacher Gifts Series #4]
 
WOW CARDS FOR THE TEACHERS
🍎❀️ Teachers are like apples: they come into our lives, bright and shiny, and nourish our minds with wisdom.
✏️ Did you know, just like our teachers, we can transform the ordinary into extraordinary? Allow me to share the magic.
πŸ”ΉI decided to create this special card for teacher appreciation.
πŸ”ΉI reached for my Stampin' Up Everyday Thanks Stamp Set and like the unsharpened pencil, thoughts started to flow. From bland to bold, from shy strokes to vibrant vibrates, the pencils began to etch gratitude.
πŸ”ΉThen came the Apple Harvest Stamp Set. As apples symbolize knowledge, it only seemed right.
πŸ”ΉColoring the images with the Stampin' Blends Markers, the flat paper began to fill with life. The result was sparkling! I couldn't help but gaze at how these images popped off the paper, just like our teachers who pop into our lives and leave an indelible mark!
πŸŽ₯ I shared how I colored these images in my teacher gift video class. 
So, who is the teacher you would like to thank? Let's honor those who inspired us to color our world! 🌈

INSTRUCTIONS

NSTRUCTIONS

TEACHER GIFTS VIDEO

TEACHER GIFTS VIDEO

PROJECT PHOTOS
Want to save these ideas for later? Pin them to your favorite Pinterest board.
Have you tried these designs? I love to see your creations! Be sure to share them on #shareyourcrafts post every Saturday on my Facebook Page
I love the way the apple and pencil pop off this card. I used the Delightfully Eclectic Designer Series Paper for the lined paper. 
The spiral edge was cut using the edge lit in the Gorgeously Made die set. The words were cut from the label die in the set. I shared how to color the apple and pencil with Stampin' Blends markers on the Teacher Appreciation video. You can see it here.   Don't forget a matching survival kit gift or gift card holder. I shared the tutorial for this mini survival kit here. 
Matching Scalloped Gift Card Holder tutorial coming tomorrow. Stay tuned to the series links below for the entire series of tutorials.My complete set of teacher survival kits and appreciation cards and gift card holders. 

TEACHER GIFT SERIES

STAMPIN UP SUPPLIES I USED
https://stampwithtami.com/?p=75014
Mini Window Box Survival Kits [Teacher Gifts Series #3]
 
MINI WINDOW BOX TEACHER SURVIVAL KITS
🍎🎁 Teacher Appreciation Alert! 🎁🍎After spending countless hours handling grades, lesson plans, and lively classrooms, our beloved teachers deserve a helping hand. So, here's presenting our unique creation - the mini 'Teacher Survival Kits'! πŸ’ΌπŸ‘©β€πŸ«πŸ‘¨β€πŸ«
Crafted with love ❀️ and sealed in the adorable Stampin' Up! Scalloped Gift Card holder boxes, these treat boxes are topped with an apple from the Stampin' Up Apple Harvest stamp set. A symbol of knowledge and gratitude for the educators who shape our future! πŸπŸ‘©β€πŸŽ“πŸ‘¨β€πŸŽ“
See more of my Teacher Gifts series below.

INSTRUCTIONS

NSTRUCTIONS

TEACHER GIFTS VIDEO

TEACHER GIFTS VIDEO

PROJECT PHOTOS
Want to save these ideas for later? Pin them to your favorite Pinterest board.
Have you tried these designs? I love to see your creations! Be sure to share them on #shareyourcrafts post every Saturday on my Facebook Page

Here's my top 10 list of items to add to your Teacher Survival Kit that I shared on the video class:1️⃣ Hand Sanitizer - for germ-free hands πŸ‘2️⃣ Pain Reliever - because teaching can be a headache, literally! πŸ™†β€β™€οΈ3️⃣ Band-Aids - for those paper cut days 🩹4️⃣ Hand Lotion - because sanitizers can dry their hands out 🀲5️⃣ Tide Pen - to rescue them from surprise coffee spills β˜•6️⃣ Lysol Spray - for a fresh and clean workspace 🧽7️⃣ Paper Slips - for impromptu notes πŸ“‹8️⃣ Elastics - because you never know! πŸ’β€β™€οΈ9️⃣ Breath Mints - to stay fresh during those parent-teacher meetings πŸ—£οΈπŸ”Ÿ Amazon Gift Card - for them to buy whatever they need or want 🎁
What do you think should go into the teacher survival kit? Share your suggestions in comments below and be entered to win our giveaway!
I'll share the tutorials for this last set of boxes shortly. Check my series links below or my blog for the complete set.  I shared the larger box #1 on yesterday's video class. You can see the class, download the tutorial and the template here. Don't forget the matching card. I'll share how to make this card tomorrow. Doesn't it just pop?My complete set of teacher survival kits and appreciation cards and gift card holders. 

TEACHER GIFT SERIES

STAMPIN UP SUPPLIES I USED
https://stampwithtami.com/?p=75003
Make waves with the Whale Watching Stamps
WHALE WATCHING CARD
So thrilled to dive into my latest haul of pre-order goodies from the 2023 Stampin' Up Mini Catalog (Sept-Dec edition). As an ocean lover, I couldn't resist Stampin' Up's Whale Watching & Waves of Inspiration Stamp Sets to create this jaw-dropping card. 🌊
Wondering how I made the whale seem like it's breaching out of a wave? 🐳 Here's a peek into my creative splash:
1️⃣ Stampin' Up! Whale Watching Stamp Set 🐳: This set brings the majesty of the orcas right to your crafting table, perfect for creating a dramatic centerpiece!
2️⃣ Waves of Inspiration Stamp Set 🌊: Add depth and dynamism to your card with this lively wave, making a perfect backdrop for marine-themed projects like this one (see below for more).
3️⃣ Masking technique🎭: This tried and tested method allowed me to make the whale look like it's leaping out from the waves. Curious how? There's a video tutorial for you below. πŸŽ₯
4️⃣ Stampin' Blends Markers: I colored this project with blends alcohol markers. The video below shares how to this as well. 

INSTRUCTIONS

INSTRUCTIONS

NEED HELP WITH THESE TECHNIQUES? 

If you need some help with the Stampin' Blends Marker techniques and / or masking the whale. Check out my video tutorial.

VIDEO

PHOTOS
Want to save these ideas for later? Pin them to your favorite Pinterest board.
Have you tried these designs? I love to see your creations! Be sure to share them on #shareyourcrafts post every Saturday on my Facebook Page.

I added the "faith over fear" encouraging greeting for this card. But the layout can be used for any occasion. The Charming Sentiments word set works for every occasion.
I colored the wave and background with Stampin' Blends markers. 
The gulls are die cuts from the Waves Dies.

A few more cards I made with the Waves of Inspiration stamp set. Click here to see more.

SUPPLIES I USED
https://stampwithtami.com/?p=74913
SPECIALS: Tami’s Ordering Gift Tutorials for August 16-31 - Hostess Code VFMCQSS
TAMI'S STAMPIN UP SPECIALS
August 16-31 for Free Tutorial Gifts & Specials Must use hostess code: 9VFMCQSS

- 30% KITS COLLECTION SALE 
- BONUS DAYS COUPONS REDEMPTION AUG 1-31
- SEPTEMBER-DECEMBER MINI CATALOG INFO

- $26 FREE WITH DEMO KIT DEAL
- 60% OFF CLEARANCE RACK 
- FREQUENT BUYER POINTS

- TUTORIAL GIFTS - HOSTESS CODE ORDERING GIFTS
- TAMI'S VIP CLUB MEMBERSHIP - FREE TAKE YOUR PICK TOOL
- PAPER PUMPKIN KITS - Monthly DIY kits. Subscribe by the 10th of the month and get free PPX Videos with your subscription.
- SIGN UP FOR MY NEWSLETTER WITH FREE TUTORIALS

SHOP ONLINE

CURRENT SPECIALS

PERKS BY ORDER AMOUNT
Are you close to the next level of perks? Don’t miss out by a small amount on your order. Here’s a list of what you get with your orders by amount. Be sure to enter the hostess code in the shopping cart to receive these gifts.

- Orders $1-24.99 receive:

- Level 1 Tutorial Gift – Little Dreamers

- Orders $25 and up will receive:

- 1 FBP with my Frequent Buyer Point Program 
- Level 1 Tutorial Gift – Little Dreamers

- Orders $50+ receive

- Level 1 Tutorial Gift – Little Dreamers
- Level 2 Tutorial Gift – Inked & Tiled
- 2 FBP with my Frequent Buyer Point Program 

- Orders over $100

- 2 Free Ordering Tutorials
- 4+ FBP with my Frequent Buyer Point Program
- ** Consider purchasing the Demo Kit when your order reaches $100. This is the BEST DEAL! Get $26 free, discounts and free shipping Click here for details. **

- $150+ orders will receive:

- 6+ FBP with my Frequent Buyer Point Program 
- 2 Free Ordering Tutorials
- $15 Free Stampin Rewards Products
- ** Note if your order reaches the $150 level do not use the hostess code, you will automatically receive gifts at that level and Stampin’ Rewards **

SHOP ONLINE

TUTORIAL GIFTS:
Have you ever bought a stamp set just because you loved it, but then found yourself struggling for ideas and different ways to use it? You'll love my ordering gift tutorials, these Inspiration collections were created to help you.
 
LEVEL 2 CARD TUTORIAL: INKED & TILED

August 16-31 for Free Tutorial Gifts & Specials Must use hostess code: 9VFMCQSS
Level 2 - Free Tutorial Gift for Orders $50+
This "Level 2" Tutorial is my free gift for all orders placed in my online store over $50** and demonstrators to my Stamp It Group.
These 4 cards designed with the Inked Botanicals Suite (Inked & Tiled Bundle). This suite can be found in my online store and in the 2023-24 Stampin' Up! Annual Catalog. 

Tutorial includes

- Step by step instructions
- Photos of each step
- Supply list
- Dimensions

* Stamp set is not included** Must use hostess code on orders under $150
Tutorials will be sent via email.


LEVEL 1 CARD TUTORIAL: LITTLE DREAMERS

August 16-31 for Free Tutorial Gifts & Specials Must use hostess code: 9VFMCQSS
This "Level 1" Tutorial is my free gift for all orders placed in my online store using the hostess code**. This card making tutorial features 4 cards using the Stampin' Up! Little Dreamers Bundle.
If your order is over $50 you will also earn my Level 2 tutorial as well.
Step by step instructions

- Step by Step instructions
- Supply list
- Measurements

** Must use hostess code on orders under $150
Tutorials will be sent via email
https://stampwithtami.com/?p=74891
Time Together Penny Spinner Card [Card 3 of 3]
TIME TOGETHER SPINNER CARD
Imagine an hourglass⏳ spinning across your card – Yes, you read it right! I introduce to you, the Hourglass Penny Spinner Card, adding a secret touch of your "2 cents" to every card you send out!πŸ’Œ
Curious on how it's made? Don't fret! I've prepared a short video tutorial πŸŽ₯ just for you.
🎨 Step 1: Get your own Stampin Up Time Together Bundle. This will be your magic kit!✨🎨 Step 2: Follow my tutorial. Pause, rewind, practice till you get it right!πŸ”„πŸŽ¨ Step 3: Add your personal "2 cents" to each card, making it uniquely yours.🎨 Step 4: Don't forget to share your creations with me on my Saturday Facebook Share. 
The joy of crafting is in sharing, right? So, why wait! Get your Stampin Up Time Together Bundle, start crafting, and unveil the magic!✨
Let's get spinning! πŸŒ€
This is the third in a mini-series I have featuring the Time Together stamp set and dies.

INSTRUCTIONS

INSTRUCTIONS

SHORT VIDEO TUTORIAL

PHOTOS
Want to save these ideas for later? Pin them to your favorite Pinterest board.
Have you tried these designs? I love to see your creations! Be sure to share them on #shareyourcrafts post every Saturday on my Facebook Page.
I love the idea of the spinning hourglass card. I used the banner from the Time Together die set for the track.
Penny spinner cards make such fun interactive cards. The background is embossed with the Exposed Brick Folder.     
The rest of my mini series featuring the Stampin' Up Time Together bundle.

SUPPLIES I USED
https://stampwithtami.com/?p=74826
Time Together Peak-a-boo Window Card [Card 2 of 3]
TIME TOGETHER WINDOW
πŸ”₯Hot Off The Craft Table!πŸ”₯
πŸ•°οΈ Unveiling the Peak-a-Boo Window Card with a twist! Crafted with love ❀️ and creativity πŸ’‘ using the Stampin' Up Time Together stamp set and dies. 
πŸ‘€ Open it and WOW - a surprise window lifts, and the hourglass remains, as if caught in a moment of time, great for birthdays, anniversaries, or just because! πŸ’Œ A step-by-step tutorial awaits below.
πŸ“ Here's how you can make one:1. Grab your Stampin' Up Time Together stamp set and dies.2. Follow the instructions to assemble the card.3. Personalise your message and voila...you've created a magic moment.
πŸ’‘ Ideal for sending to loved ones across the miles, great for many occasions, or simply to bring a smile to someone's day.
This is the second in a mini-series I have featuring the Time Together stamp set and dies.

INSTRUCTIONS

INSTRUCTIONS

PHOTOS
Want to save these ideas for later? Pin them to your favorite Pinterest board.
Have you tried these designs? I love to see your creations! Be sure to share them on #shareyourcrafts post every Saturday on my Facebook Page.
This fun peak a boo window looks great from every angle. Even standing you can see the hourglass reveal inside.
When you life the top the hourglass remains inside and outside.      
I'll be sharing the rest of my Time Together cards in the next few days. Stay tuned for more.

SUPPLIES I USED
https://stampwithtami.com/?p=74815
Time Together Fun Fold Card [Card 1 of 3]
TIME TOGETHER FUN FOLD
This isn't your run-of-the-mill greeting card, it elevates the concept of gifting, making it a "timeless" keepsake (see what I did there?). Imagine if you could capture moments like sands through an hourglass ⏳? The Stampin Up Time Together Bundle makes this possible in paper crafts. This card was made with special touches like a Window Sheet that mimics real glass, complemented by Distressed Gold Specialty paper.
I've got a short video πŸŽ₯ and a tutorial on how to make this special card yourself. Making it, is just as fulfilling as giving it away – an art project and a gift all in one.
Whether it's a birthday πŸŽ‰, anniversary, or just because - celebrate your special someone by gifting them a token of your love, handcrafted by you, curated by us. Let the sands of time carry your love in a card!
This is the first in a mini-series I have featuring the Time Together stamp set and dies.

INSTRUCTIONS

SHORT VIDEO TUTORIAL

PHOTOS
Want to save these ideas for later? Pin them to your favorite Pinterest board.
Have you tried these designs? I love to see your creations! Be sure to share them on #shareyourcrafts post every Saturday on my Facebook Page.
The front hour glass panel lifts to reveal a special greeting inside. 
The flowers were colored with Stampin' Blends Markers.  I added a Window Sheet to the top of the stamped hourglass image to give the effect of glass. 
stampwithtami timeless greetings celebrate card instructions I'll be sharing the rest of my Time Together cards in the next few days. Stay tuned for more.

SUPPLIES I USED
https://stampwithtami.com/?p=74796
20% OFF - TAMI'S INKED BOTANICALS KIT OFFER - ENDS AUG 1
TAMI'S SPECIAL OFFER INKED BOTANICALS KIT
Offer ends August 13 and includes a free class
If you're a DIY Craft Enthusiast, Card Making Hobbyist, or a Stamp Collection Fanatic, buckle up because I've got some FUN-tastic news for you. I'm rolling out a 2nd chance offer on my August Special Offer Stamps in the Mail Kit that you will absolutely LOVE! πŸ‘€
Here are FIVE reasons why you should order yours TODAY:
1. 🎨 20% OFF on Inked Botanicals Suite! 🎨Save up BIG on the stunning collection of Inked Botanicals Suite. Unleash your creativity and make your projects 'ink-credible' with our high-quality, versatile and beautiful stamps, punches, paper and ribbon.
2. πŸ“š Get a FREE Class! πŸ“šYes, you read it right! I'm including a FREE class with the kit, tailor-made to inspire and awaken the Picasso within you!
3. 🎁 All-in-one Package! 🎁I'm  not just offering suite - I'm giving you a complete package! The kit includes supplies, video tutorials, templates and much more. Equip yourself with everything you need to create your masterpiece and more.
4. πŸ’Œ Make Beautiful Card Holder Boxes! πŸ’ŒWith included templates, create your very own beautiful card holder box. Perfect to keep your beautiful handmade cards neat and organized or even to gift it to someone special.
5. 🌈 3 Fun Fold Cards! 🌈Bored of the regular cards? I've got you covered! The kit includes 3 fun fold cards that guarantee to add a twist of enjoyment and fun to your card making sessions.
Hurry! Don't let this offer slip through your fingers. Grab your kit TODAY
➑️ Already have these stamps/punches? You can substitute for another product and still get all of the perks. 

VIP CLUB MEMBER DISCOUNT

- Receive an additional 10% off the kit. Be sure to use the special VIP form on the VIP site to receive your discount.
- Kit purchase counts as August VIP purchase.
- Not a VIP member yet? Learn more about getting your wish list on a budget with perks

JOIN THE VIP CLUB

This DIY card making kit is great for all levels of paper crafters from beginners to advanced. It will include a written pdf tutorial with photos of each step, an accompanying video tutorial and the supplies to make all of these projects. See the list below for what is included, and the basic supplies you’ll need to complete your kits. You may add on to the kit if you'd like additional products.

ORDER KIT

ADDITIONAL SUPPLIES & ADD ONS

Add on any current products to your kit. You'll earn Double FBP on your add ons. 
These are the supplies you will need (or equivalent) to complete the free class:

- Pretty Peacock Classic Stampin' Pad  
- Lost Lagoon Classic Stampin' Pad  
- Calypso Coral Classic Stampin' Pad
- Paper Trimmer
- Bone Folder  
- Stampin' Seal
- Stampin' Seal+  
- Stampin' Dimensionals

- Subtles Stampin' Write Markers Optional
- Brights Stampin' Write Markers Optional
- Basics 3D Embossing Folders Optional


KIT ORDER FORM
https://stampwithtami.com/blog/2023/08/20-off-tamis-inked-botanicals-kit-offer-ends-aug-1-2/
Stepping Up Kits: Timeless Greetings Set - Part 3
TIMELESS GREETINGS
How do we make the world 🌎 a better place? Well, friends, we start small. Small as a card, in fact. πŸ’Œ
Picture this:A card so shiny, it's impossible to ignore. ✨ A masterpiece of Holographic Specialty Paper, a small piece of cosmos in your very hands. Imagine the joy it brings to the receiver, glistening as it does in the light, a tangible piece of magic.
This box coordinates with the card, an unassuming twin, sharing in the magic. I created these with the Stampin' Up! Timeless Greetings Card Kit.
But wait! It does not end here. πŸ™…β€β™€οΈ Oh no, my fellow paper craft enthusiasts, I have more to share with this kit. Check out more alternate ideas in this series.
Guess what? These kit cards are on SALE this month! Grab yours now and let the fun begin right away!

SHOP THE KITS COLLECTION

INSTRUCTIONS

NEED HELP ?Check out the Stampin Up video tutorial and my video tutorial on how to make arrow and accordion fun folds. 

TIMELESS GREETINGS CARD KIT TUTORIAL

STEPPED UP KITS COLLECTION LINKS

PHOTOS
Want to save these ideas for later? Pin them to your favorite Pinterest board.
Have you tried these designs? I love to see your creations! Be sure to share them on #shareyourcrafts post every Saturday on my Facebook Page.
The Stampin Up Holographic Specialty Paper is fantastic and shiny. It changes color in the light and really draws your attention.I used the Watercolor World for the background of this card.
I sponged the background of the globe with Balmy Blue.  
The treat box was made with the printed patterns from the Timeless Greetings Kit. I cut the top border with the Basic Borders dies.  The box coordinates with the cards from the kit as well. 

A few more of the alternates I created with the current Stampin' Up! Kits Collection. I have tutorials above for these.

CURRENT KITS
https://stampwithtami.com/?p=74788
Stepping Up Kits: Timeless Greetings Pull Tab - Part 1
TIMELESS GREETINGS PULL TAB CARDS
Let's talk about a crafting game-changer! These pull tab flip cards are a fun and interactive way to send greetings. Add a personal touch to any occasion! Struggling to find a card that caters to the men in your life? These flip cards make the perfect "man card". Emotional enough to warm hearts, but cool enough to keep it manly. 
No need to worry if you're not a crafting guru! I've created super easy step-by-step instructions and 2 helpful videos that guide you through the process!
Guess what? These kit cards are on SALE this month! Grab yours now and let the fun begin right away!

SHOP THE KITS COLLECTION

INSTRUCTIONS

INSTRUCTIONS

NEED HELP ?Check out the Stampin Up video tutorial and my video tutorial on how to make arrow and accordion fun folds. 

TIMELESS GREETINGS CARD KIT TUTORIAL

FLOATING FRAMES TECHNIQUE

CLICK PULL TAB CARD HELP

SHORT VIDEO TUTORIAL
See the full length tutorial above for more detailed help.

STEPPED UP KITS COLLECTION LINKS

PHOTOS
Want to save these ideas for later? Pin them to your favorite Pinterest board.
Have you tried these designs? I love to see your creations! Be sure to share them on #shareyourcrafts post every Saturday on my Facebook Page.
This is a great card kit. East and fun cards. These are the cards made per the instructions. I have some more alternates coming in the next few days. 
When you pull the tab the watch panel flips open to reveal a special greeting. The card also opens normally so there is plenty of space to sign your name and write or stamp a sentiment.
The Stampin' Up Rose Gold Specialty foil paper is stunning and grabs your attention. I embossed the background with the Metal Plate 3D folder to give it some texture.
A few more of the alternates I created with the current Stampin' Up! Kits Collection. I have tutorials above for these.

CURRENT KITS
https://stampwithtami.com/?p=74747
Here's to Love Card [Triple Tier Series #8]
HERE'S TO LOVE TRIPLE TIER CARD
πŸŽ‰πŸ’ Ever wondered how to make your wedding wishes even more special?
Look no further, this exquisite triple tier pull-out card set borrows a touch of magic from the world of fairy tales - with a closed card featuring the bride in her radiant glory, and a grand reveal of the groom as the card is pulled open. Created with the Stampin' Up Here's to Love stamp set.
Raise your glass and imagine the flutter of excitement and surprise your loved ones will experience as they open this unique card to be greeted by a charming visual story of their love! It's not just a card, it's a keepsake, a delightful surprise that's perfect for celebrating weddings, engagements and even creating your own invites.πŸ’Œ
This is #8 in my triple tier pull out fun fold series.

INSTRUCTIONS

NSTRUCTIONS

TRIPLE TIER VIDEO

TRIPLE TIER VIDEO

CARD PHOTOS
Want to save these ideas for later? Pin them to your favorite Pinterest board.
Have you tried these designs? I love to see your creations! Be sure to share them on #shareyourcrafts post every Saturday on my Facebook Page
The Stampin' Up Here's to Love stamp set is customizable to match your loved one's wedding themes.
This is a view of the card fully opened and the bride and groom are both showing. 
Closed the card shows the bride, as it opens the next tier reveals the groom. 
I used Silver Foil specialty paper and heat embossed the words and images in silver to match. I added a kickstand to the back so it stands on it's own and can be displayed. 

TRIPLE TIER TUTORIAL SERIES

STAMPIN UP SUPPLIES I USED
https://stampwithtami.com/?p=74714
Fun Folds from the July Paper Pumpkin kit
FUN IN THE SUN ALTERNATE PROJECTS
I'm sharing the love with some Paper Pumpkin inspiration. It's time for out APPT – β€œA Paper Pumpkin Thing” blog hop and it is full of inspiration. This month we're sharing alternate ideas featuring the July 2023 β€œFun in the Sun” Paper Pumpkin kit.
I’ve been falling in love with the 'Fun in the Sun' Paper Pumpkin kit - I mean, who wouldn't? These side step fun fold cards are an absolute blast to create and share! 
Taking it one step further, I found myself diving into the world of interactive fancy fold cards that are easy for you to recreate. Are you worried about how to get started? πŸ€” Worry not, because I've got you covered! 
πŸ‘‡πŸ‘‡ Included with this post:
1️⃣ Step-by-step instructions so you will never feel lost. 2️⃣ A helpful DIY video for the fold flat z fold technique that will guide you through your crafting journey! πŸŽ₯3️⃣ Bonus! An exclusive link to the eye-catching triple tier pop up card tutorial! 4️⃣ Blog hop links to more ideas and inspiration for this kit.

INSTRUCTIONS

FOLD FLAT Z FOLD INSTRUCTIONS

Z FOLD FLAT VIDEO

Z FOLD FLAT VIDEO

PAPER PUMPKIN KIT VIDEO

PAPER PUMPKIN KIT VIDEO

CARD PHOTOS
Want to save these ideas for later? Pin them to your favorite Pinterest board.
Have you tried these designs? I love to see your creations! Be sure to share them on #shareyourcrafts post every Saturday on my Facebook Page.
My blog hop share is this fold flat z fold card. When it's closed it fits into the cute envelopes that comes in the kit (or a standard medium envelope).This view shows the card opened and folded flat so the front and back of the card are displayed at the same time.A view of the inside of the card.
I also created this triple tier pull out card. I have more details and a helpful video for this card here. 
 These are the adorable side step fun fold cards created per the kit instructions. 

I have a July Paper Pumpkin share challenge on my Facebook page. I love to see your projects and you could win a free kit.

BLOG HOP

 
Blog Hop Index
https://stampwithtami.com/?p=74685
Stepping Up Kits: Blossom Wishes Card Kit Alternates - Part 3
BLOSSOM WISHES CARD KIT ALTERNATES
Who else loves pairing the *perfect* card with a delightful surprise? The final chapter in my Stampin' Up! 'Blossom Wishes' series blends the magic of a slimline card with a personalized treat box. Unique, Creative, and filled with Love – just like your dear ones!
They form an impressive gift set when clubbed together. But hey, they make a stunning stand-alone gift too!
Here's the best part - there's an exclusive sale on these fab card kits this month! Yes, you heard it right. 
πŸ‘‡ Below are the step-by-step instructions and a super helpful video tutorial for creating the treat box.

SHOP THE KITS COLLECTION

INSTRUCTIONS

INSTRUCTIONS

NEED HELP ?Check out the Stampin Up video tutorial and my video tutorial on how to make arrow and accordion fun folds. 

BLOSSOM WISHES CARD KIT TUTORIAL

FLOATING FRAMES TECHNIQUE

CLICK FOR MORE FLOATING FRAMES HELP

STEPPED UP KITS COLLECTION LINKS

PHOTOS
Want to save these ideas for later? Pin them to your favorite Pinterest board.
Have you tried these designs? I love to see your creations! Be sure to share them on #shareyourcrafts post every Saturday on my Facebook Page.
The kit comes with slimline envelopes to match and fit this size card. I used the die cuts from the kit for the words and fruit.
The foil words really grab your attention.
The box matches all of the cards both from the kit and my alternates. 
  I used the 2023-25 In Color Texture Specialty Paper for the extra die cuts.  I have details on the velcro in the instructions.
A few more of the alternates I created with the current Stampin' Up! Kits Collection. I have tutorials above for these.

CURRENT KITS
https://stampwithtami.com/?p=74662
Stepping Up Kits: Blossom Wishes Card Kit Alternates - Part 1
BLOSSOM WISHES CARD KIT ALTERNATES
πŸŽ‰πŸ“£BIG NEWS: Stampin Up Kits are on SALE this month!πŸ“£πŸŽ‰
Looking for an excuse to dive into some creative projects? Now's the time! You can save a whopping 30%! πŸ˜²πŸ’°
I've been using this amazing sale as an opportunity to step up my crafting game. So, I thought, why not share this adventure with all of you? I started with the exquisite Blossom Wishes card kit.
⭐ Mini Series Alert ⭐ I'm launching a 3-part mini series of stepped up alternate projects made with this Blossom Wishes Card kit. The first part is a stunning ombre technique using Blending Brushes over the embossed card front. PLUS - some super-cool die cuts that are included in the kit. The result? VOILA! Perfection. πŸ‘Œ
πŸ’‘Remember, crafting isn't about getting it perfect, it's about having fun and letting your creativity flow. So, grab these kits on sale NOW and let's make something beautiful together!πŸ’–
 

SHOP THE KITS COLLECTION

INSTRUCTIONS

INSTRUCTIONS

NEED HELP ?Check out the Stampin Up video tutorial and my video tutorial on how to make arrow and accordion fun folds. 

BLOSSOM WISHES CARD KIT TUTORIAL

HOW TO USE BLENDING BRUSHES

STEPPED UP KITS COLLECTION LINKS

PHOTOS
Want to save these ideas for later? Pin them to your favorite Pinterest board.
Have you tried these designs? I love to see your creations! Be sure to share them on #shareyourcrafts post every Saturday on my Facebook Page.
I love the ombre background look. It's especially pretty with the embossed piece from the kit. 
 Ad spritzed some water and Wink of Stella over the top of this for the splatter and texture.
The foil words and the pears are die cuts from the kit.
Stay tuned for the next installments in this series. 
A few more of the alternates I created with the current Stampin' Up! Kits Collection. I have tutorials above for these.

CURRENT KITS
https://stampwithtami.com/?p=74625
2023 September - December Holiday Catalog Info
2023  SEPT-DEC MINI CATALOG INFO
AUGUST 2: DEMONSTRATORS & DEMO KITSEPTEMBER 5: CUSTOMERS
The new 2023 Stampin' Up! September-December Mini Catalog (or Holiday Mini for short) is coming. I will have more details Wednesday, August 2 and a box haul later this week so you can see the goodies. 
I have posted the dates and details for the new catalog hard-copy mailing for both demonstrators and customers below. If you aren’t a demo, or a regular customer of mine, and would like a hard copy of the catalog you can fill out the form at the bottom of this post.

WANT IT ALL NOW?
Beginning today you can get new colors, new pre-order products and new catalogs in the demonstrator kit.
Did you know the demonstrator kit is the BEST DEAL?It’s true, if you have any kind of wish list this is the best way to go. You get $125 for only $99 and free shipping and future discounts and perks.

Can I join as a demonstrator just for the discount?Yes, it’s the most popular reason people join. No selling, classes, parties, etc necessary unless you want to have fun doing these things. Many people take advantage of the great deal just for themselves

DETAILS

REQUEST A HARD COPY
https://stampwithtami.com/blog/2023/07/2023-september-december-holiday-catalog-info/
Gone Fishing Card [Triple Tier Series #6]
GONE FISHING TRIPLE TIER CARD
In the closed state, this triple tier card reveals an enchanting underwater scene, teeming with aquatic life. But the magic truly begins when you pull the tab. Suddenly, a boat appears, casting its fishing line, and secret message appears.
This isn't just any ordinary card; it's an adventure, a story, a surprise, all packed into three layers! Designed with the versatile Stampin' Up! Let's Go Fishing Suite, this card will hook your loved ones. And they can proudly display it with the convenient kick stand. 
This is #6 in my triple tier pull out fun fold series.

INSTRUCTIONS

NSTRUCTIONS

TRIPLE TIER VIDEO

TRIPLE TIER VIDEO

CARD PHOTOS
Want to save these ideas for later? Pin them to your favorite Pinterest board.
Have you tried these designs? I love to see your creations! Be sure to share them on #shareyourcrafts post every Saturday on my Facebook Page
I added a kickstand to the back of the card so it can stand on it's own. I also added the tail end of one of the fish I cut from the front.
I love the hidden surprises in the triple tier pull out cards. In this card it's the boat and greeting that will surprise and delight.   I lined up the black twine on each tier so it looks like it's all attached when the card opens. I used the Holographic Trio specialty paper for the lurer. It is shiny and certainly attracts your attention.
 
Don't miss my other fun tutorials created with the Stampin Up Let's Go Fishing Suite.  

TRIPLE TIER & FISHING TUTORIAL SERIES

STAMPIN UP SUPPLIES I USED
https://stampwithtami.com/?p=74527